Basic partitioning
Apple ships all its Macs with a single user partition on each drive which results in a single
volume that
appears on the desktop eg “Macintosh HD”. As a result,
all available space is shared by everything: system software,
applications
and your
data. This is bad computer hygiene.
If the system software goes nutty and requires
reinstallation, you now face the problem of wiping out your data when
you reinstall the system.
By keeping system software and applications separate from your data, this headache goes away, and it also offers potential
performance advantages too.
Installing a new hard disk
When you first install a new hard disk
in an internal bay
or an external enclosure, Mac OS X will prompt you to do something
about it,
like this:
 |
| An unformatted disk has appeared (Mac OS X)
|
You will get one such dialog for each newly-installed disk. If you
intend to use Apple’s Disk Utility to format and partition them,
click the button (it doesn’t initialize, it just brings up Disk Utility). If you
intend to use SoftRAID or another alternative, click . There is no reason to
click .
Shown below is a portion of Disk Utility’s window with
four uninitialized disks (Hitachi 1TB drives), along with some
existing disks and volumes. SoftRAID has an equivalent
display, shown at right with four Western Digital RE3 drives.
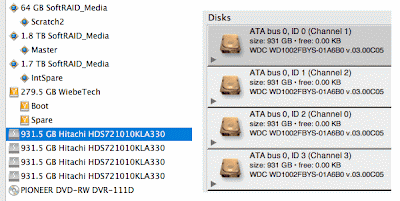 |
Disk display: Disk Utility (left), SoftRAID (right)
|
Single partition
Shown below is Apple's Disk Utility window. Shown
selected is one hard drive (a Maxtor 7H500F0 500GB drive). For a single
hard drive
partition resulting in a single volume, use the tab, giving the volume a name other than “Untitled” as
seen below. Stick with unless you know what you’re doing and you really
need something else.
Clicking will partition the hard drive, write the operating system records ("file system")
and mount a new volume icon on the desktop—you're done.
 |
Creating a single partition/volume using all space on a single hard drive
|
Two partitions
In this case, we will create two partitions. As shown, the partition will be 32GB, the fastest part
of the drive, and suitable for a scratch disk or other high-performance purpose. The
partition
contains
all the remaining space. More than two partitions is
rarely useful, and here our goal is to divide the hard drive into a fast
and slow area.
1. Select
2. Click on each partition and give it a name. Set the size of to 32GB, will
automatically change to the leftover amount (433.76GB).
3. Click . When the process completes, two new volume icons will appear on the desktop.
Repeat this process for other hard drives.
 |
Creating a single partition/volume using all space on a single hard drive
|